

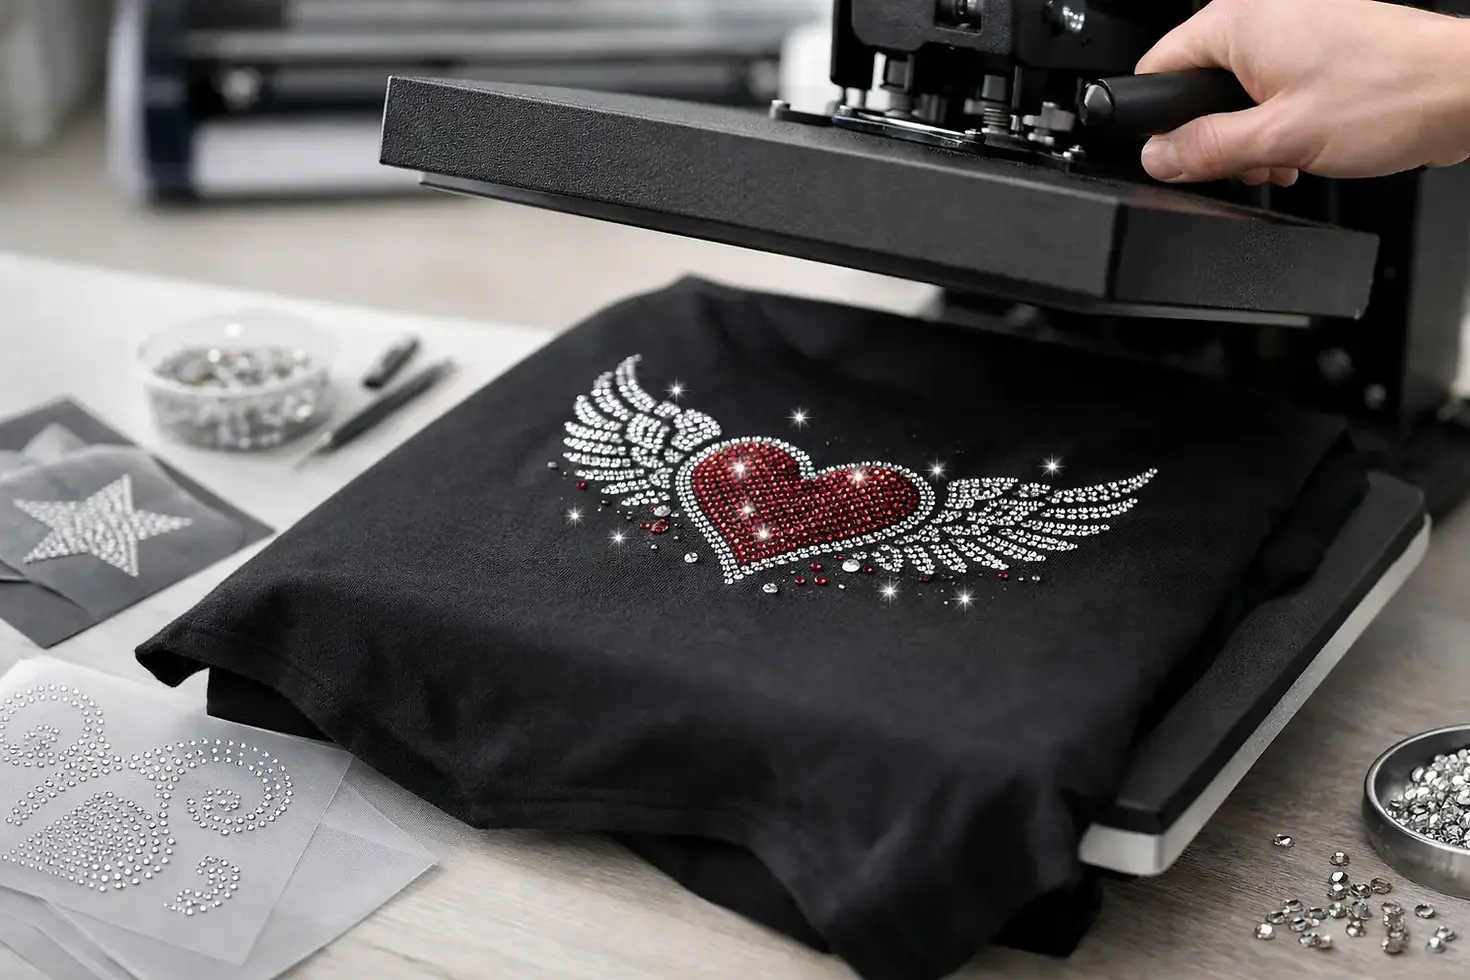
How to Press Rhinestone Transfers Without Guesswork

A rhinestone transfer can look like premium boutique apparel in seconds - or turn into a costly redo if the stones do not bond correctly. Knowing how to press rhinestone transfers comes down to controlling three things: accurate heat, firm even pressure, and the correct peel. Get those right, and you can produce sparkling shirts for teams, birthdays, Greek organizations, fundraisers, dance groups, and paying clients without wasting blanks.
Rhinestones are not pressed like every other transfer type. The stones need enough heat to activate the adhesive, but too much heat, pressure, or movement can damage the fabric, shift the design, or leave stones behind on the carrier. Treat every press like a production step, not a guess-and-go craft project.
Start With the Right Blank and Setup
Your garment matters before the press ever comes down. Cotton, polyester, cotton-poly blends, and many performance fabrics can work well with rhinestone transfers, but the transfer instructions should always win. Different adhesives and rhinestone materials may require different settings, especially on heat-sensitive polyester or stretch garments.
Choose a clean, dry blank with a smooth pressing surface. Avoid shirts with heavy seams, zippers, buttons, pockets, or thick fabric folds under the design area. An uneven surface creates uneven pressure, and uneven pressure is one of the fastest ways to lose stones during the peel or after the first wash.
Set up a quality heat press whenever possible. A household iron is not the move for customer orders or anything you expect to last. Irons heat inconsistently, make it difficult to apply full pressure, and can leave parts of the design under-bonded. A clamshell, swing-away, or drawer-style heat press gives you the repeatable results a side hustle or growing apparel business needs.
Before placing the transfer, pre-press the garment for about 3 to 5 seconds. This removes moisture and wrinkles from the print area. Moisture can interfere with adhesion, while wrinkles can keep individual stones from receiving full contact with the heat platen.
How to Press Rhinestone Transfers Step by Step
Start by checking the specific instructions supplied with your rhinestone transfer. There is no single temperature and time that fits every transfer supplier, stone type, adhesive, and garment. Still, many hotfix rhinestone transfers fall in the neighborhood of 300°F to 330°F for 10 to 15 seconds with firm pressure. Use that range as a starting point only when your transfer instructions do not state otherwise.
Position the design carefully
Place the rhinestone transfer on the garment with the carrier sheet facing up and the stones against the fabric. The adhesive side must touch the shirt. Center the design based on the garment and intended look, not just the collar. For a standard adult tee, the top of a full-front design often sits around 2 to 3 inches below the collar seam, but sizing changes the placement.
For left-chest logos, align the artwork visually with the shirt rather than measuring from the side seam alone. Small placement errors are obvious with rhinestones because the sparkle naturally pulls the eye. If you are pressing multiple shirts, use a placement guide, ruler, or alignment tool to keep every piece consistent.
Cover and press with firm pressure
If your transfer instructions recommend a cover sheet, use parchment paper, a nonstick protective sheet, or the specified cover material. Do not use random paper products that can scorch, stick, or leave texture behind. Many rhinestone transfers can be pressed directly through their carrier, but supplier directions should guide the setup.
Close the heat press with firm, even pressure. This is not a light press. The adhesive behind each stone needs full contact with the fabric, so a press that barely closes can create a design that looks fine at first but sheds stones after washing. At the same time, avoid cranking pressure so high that you crush stones, flatten delicate fabric, or leave harsh platen marks.
Keep the press closed for the full recommended time. Do not open it early to check progress. Every time you interrupt the press cycle, you risk reducing the adhesive bond and adding unnecessary inconsistency to your workflow.
Peel at the correct temperature
The peel is where many otherwise solid presses go wrong. Some rhinestone carrier sheets are warm peels, meaning you remove the carrier shortly after pressing. Others require a cool peel, meaning the garment should rest until it is cool enough to handle. A few may call for a second press after peeling.
Follow the peel instruction exactly. If it is a warm peel, lift one corner slowly and pull the carrier back low and close to the shirt instead of pulling upward. Watch the stones as you peel. If any remain attached to the carrier, lay it back down, cover if needed, and press again for a few seconds with firm pressure.
Do not rush a cool peel because you are trying to finish an order faster. That shortcut can pull stones from the garment before the adhesive has set. A few extra minutes at the press beats replacing a blank and remaking a transfer.
Finish with a post-press when required
Some rhinestone transfers benefit from a final press after the carrier has been removed. Cover the exposed stones with parchment or the recommended protective sheet, then press for the directed time. This can help seat the stones and improve durability.
Not every transfer needs a post-press, so do not add one just because it sounds safer. Excessive heat can affect certain stones, adhesives, or fabrics. Production quality comes from following the correct process consistently, not adding extra steps at random.
Pressure, Temperature, and Time: What Changes the Result
When a rhinestone design fails, the problem is usually not the stones. It is the press setup. Temperature that runs too low may not activate the adhesive fully. Too little time can create the same issue. Weak pressure leaves gaps between the adhesive and fabric, especially on textured garments or areas near seams.
Too much heat has its own consequences. Polyester can scorch, discolor, or develop a shiny press box. Stretch fabrics may distort. Certain stones can lose their finish or look dull after excessive exposure. If you work with performance wear, jerseys, or light-colored polyester, test a small area or extra blank first. That small test protects your profit margin.
Your heat press may also be the issue. The number on the display is not always the real platen temperature. If you press transfers regularly, use a temperature strip or infrared thermometer to verify that your machine is heating evenly. Check pressure, too. A press can feel tight while still delivering weak pressure across a large design.
Common Rhinestone Transfer Mistakes That Cost You Money
One common mistake is pressing over seams or thick garment edges. The transfer may look attached around the center but fail around the raised area. Use a pressing pillow or position the garment so the design area stays flat.
Another is skipping the pre-press. It feels like a small time saver, but moisture and wrinkles can create adhesion problems that show up later. The same goes for failing to inspect the transfer before pressing. Make sure stones are aligned, the design is right-side up, and there are no missing sections before heat is applied.
Avoid stretching the shirt while it is hot. Let the garment cool and stabilize before handling it aggressively, folding it, or bagging it for a customer. If you are running a larger order, establish one tested setting and repeat it across the batch rather than changing pressure or time based on instinct.
Finally, never promise wash durability without testing your own workflow. A transfer can be high quality, but your temperature, pressure, fabric, and peel method determine the finished result. Press a sample, wash it according to the garment care instructions, and inspect it before committing to a major client order.
Give Customers Care Instructions That Protect the Sparkle
The press is only half the job. Rhinestone apparel needs practical care instructions so customers do not undo your work in one laundry cycle. Recommend washing the garment inside out in cold water with mild detergent. It should be dried on low heat or hung to dry when possible. Bleach, high heat, aggressive fabric softener, and ironing directly over the stones can shorten the life of the design.
For decorated apparel you sell, add the care instructions to the package, receipt, hang tag, or customer message. This is a simple professional touch that reduces avoidable complaints and helps protect repeat business.
Build a Repeatable Pressing Process
If rhinestones are part of your apparel hustle, do not rely on memory from order to order. Keep a simple production record for each transfer type: garment material, temperature, press time, pressure level, peel type, and whether a post-press was used. Once you find a combination that works, you have a reliable recipe for future jobs.
For creators who need ready-to-press designs without setup headaches, Signsinsymbols offers rhinestone transfer options built for fast custom apparel production. Pair a dependable transfer with a calibrated heat press, and you can turn a plain blank into a product that looks polished enough to sell.
The goal is not just to get stones onto a shirt. It is to press every design with enough consistency that your customer can wear it proudly, wash it confidently, and come back ready to order the next one.
Comments